Autocomplete textbox in php


How to create Autocomplete textbox in php ?


To Create a Autocomplete textbox in php do following easy steps:-


 Step 1 :- Create a new database give name as email. Create a new table give name as a registration table. Registration table contain registeration id, user name and email address.


Step 2 :- Create a new folder in htdocs give name as a autocomplete. create a new file and save as a db.php. db.php page
contain following code for the make connection with database required for the autocomplete box.

db.php

<?php
//db.php 

 $servername = "localhost";
 $username = "root";
 $password = "";
 $dbname = "email";  // your database name

// Create connection
$conn = new mysqli($servername, $username, $password, $dbname);
// Check connection
if ($conn->connect_error) {
    die("Connection failed: " . $conn->connect_error);
}
else{
  // /echo 'Connected ....';
}
?>


Step 3 :- create a new file and save as auto.php. In these file write a
simple textbox code and give a id name to a textbox and also import cdn file link in header and write a jquery autocomplete function code as shown in below page auto.php


auto.php

<!DOCTYPE html>
<html lang="en">
<head>
  <title>Bootstrap Example</title>
  <meta charset="utf-8">
  <meta name="viewport" content="width=device-width, initial-scale=1">
  <!-- Script -->
  <script src="https://ajax.googleapis.com/ajax/libs/jquery/3.2.1/jquery.min.js"></script>

  <!-- jQuery UI -->
  <link rel="stylesheet" href="https://ajax.googleapis.com/ajax/libs/jqueryui/1.12.1/themes/smoothness/jquery-ui.css">
  <script src="https://ajax.googleapis.com/ajax/libs/jqueryui/1.12.1/jquery-ui.min.js"></script>
  </head>
<body>

<div class="container">
  <form>
    <div class="form-group">
      <br/>
      <label for="usr">Email ID:</label>
      <input type="text" id="email" name="email" class="form-control" placeholder="To">
    </div>
  </form>
</div>

<script type="text/javascript">
    $(function() {
    $("#email").autocomplete({
      source: 'search.php'
    });
  });
</script>
</body>
</html>


Step 4 :-  Create a new page and save as a search.php
On these page we are passing email id as term and that term passing to a select query for matching and the matching result again pass to the function as json data.

search.php

<?php require "db.php"; ?>
 <?php 
  $searchTerm = $_GET['term'];
  //get matched data from skills table
  $query = mysqli_query($conn,"SELECT * FROM registration WHERE email LIKE '%".$searchTerm."%' ORDER BY email ASC");
  while ($row = mysqli_fetch_array($query)) {
      $data[] = $row['email'];
  }
  //return json data
  echo json_encode($data);
 ?> 


 Output :-

autocomplete_textbox_in_php
Autocomplete Textbox 


Create Automatic Table (Dynamically) in PHP using mysqli

How To Create Table Dynamically using Php Step By Step :-

Step 1)

Create folder in htdocs give name as a table. open folder and create a new file save as db.php and copy the code the db.php code.

db.php

<?php
$servername = "localhost";
$username = "root";
$password = "";
$dbname = "table";

$conn = new mysqli($servername, $username, $password, $dbname);

if($conn){

}else{
    echo "Connection Failed";
}
?>


 Step 2)  

Open a browser type http://localhost/phpmyadmin/   in url.Click on Create new database as give name table to databaseand check connetion is successfully established or not.


Step 3) 

Create a new file give name as table.php and copy the code of 

table.php

 <?php
include "db.php";

if(isset($_POST['submit'])){

$table_name=mysqli_real_escape_string($conn,$_POST['table_name']);

$result = mysqli_query($conn,"SHOW TABLES LIKE '".$table_name."'");
if($result->num_rows == 1) {

        echo '<script language="javascript">';
        echo 'alert("Table exists, Please try again")';
        echo '</script>';
}
else {
  
    $table5 = "CREATE TABLE $table_name ( id INT(250) UNSIGNED AUTO_INCREMENT PRIMARY KEY,emp_name VARCHAR(200), salary VARCHAR(200),status tinyint(1) DEFAULT '1', date datetime)";
    $res5=mysqli_query($conn,$table5);

        echo '<script language="javascript">';
        echo 'alert("Table Successfully Created")';
        echo '</script>';
}
}
?>
<!DOCTYPE html>
<html>
<head>
    <title>home page</title>
</head>
<body>

    <form action="" method="post" style="margin-top: 50px;margin-left: 70px;">
        <input type="text" name="table_name"><br/><br/>
        <input type="submit" name="submit" value="submit">
    </form>

</body>
</html>


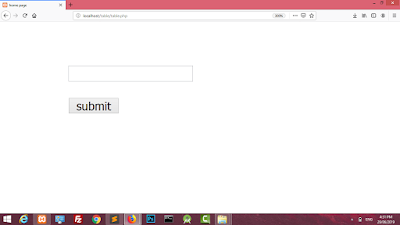
Output Screens:-


create-table-automatically-php
Output Screen


create-table-automatically-php


create-table-automatically-php


Google Line Chart Php Mysql

Google Line Chart Php Mysql 

 In these blog we learn how to create a google line chart in php mysql. In easy step by step.

Step 1) create a new folder in htdocs give name as a line-chart
in folder create a file save as line.php and copy below code and paste in line.php

line.php

  <html>
  <head>
    <script type="text/javascript" 
 src="https://www.gstatic.com/charts/loader.js"></script>
    <script type="text/javascript">
      google.charts.load('current', {'packages':['corechart']});
      google.charts.setOnLoadCallback(drawChart);

      function drawChart() {
        var data = google.visualization.arrayToDataTable([
          ['Year', 'Sales', 'Expenses'],
          
          //PHP Code 
          <?php
              $query="select * from chart";
              $res=mysqli_query($conn,$query);
              while($data=mysqli_fetch_array($res)){
                $year=$data['year'];
                $sale=$data['sale'];
                $expense=$data['expenses'];
          ?>  
           ['<?php echo $year;?>',<?php echo $sale;?>,
<?php echo $expense;?>], 
          <?php      
              }

          ?> 
 
        ]);

        var options = {
          title: 'Company Performance',
          curveType: 'function',
          legend: { position: 'bottom' }
        };

        var chart = new google.visualization.LineChart 
(document.getElementById('curve_chart'));

        chart.draw(data, options);
      }
    </script>
  </head>
  <body>
    <div id="curve_chart" style="width: 900px; height: 500px"></div>
  </body>
</html>

Start Xampp and then type in browser http://localhost/line_chart/line.php
 your output should look like these. but still is static so now we convert it into dyanamic using php mysql.

Output :-
google-line-chart-php-mysql,line-chart-php
Line Chart

Step 2) create db.php and copy below code in it.

db.php

<?php
$servername="localhost";  
$username="root";  
$password="";   
$dbname="chart"; 

$conn=new mysqli("$servername","$username","$password","$dbname");

if($conn){

}else{
    echo "Connection Failed";
}
?> 

 
Step 3) Open browser and type http://localhost/phpmyadmin
create a new database name as chart and create a chart table in it.

create table chart query:

CREATE TABLE chart
(
  chart_id INT PRIMARY KEY,
  year VARCHAR(255) NOT NULL,
  sale VARCHAR(255) NOT NULL,
  expenses VARCHAR(255) NOT NULL,
);


 Table Structure should be Look like these:


google-line-chart


 now insert these records in chart table.

INSERT INTO Chart (year, sale, expenses) 
VALUES ('2004', '1000', '400');

INSERT INTO Chart (year, sale, expenses) 
VALUES ('2005', '1170', '460');

INSERT INTO Chart (year, sale, expenses) 
VALUES ('2006', '660', '1120');

INSERT INTO Chart (year, sale, expenses) 
VALUES ('2007', '1030', '540');


Step 4)  Now run again the line.php page and your output should be look like these dyanamically from table.

google-line-chart-php-mysql
Final Output


Registration Form in PHP with validation using Bootstrap


In these Blog we learn how to create a simple resgistration form using php bootstrap with validation in simple steps.


Step 1)  Design Registration Form using bootstrap

Create a page and save as a form.php for design a registration form using bootstrap. if you want to design another form you can create your own design or use the code below.

form.php

<!DOCTYPE html>
<html>
<head>
    <title>Registration From in PHP</title>
    <link rel="stylesheet" href="https://maxcdn.bootstrapcdn.com/bootstrap/3.4.0/css/bootstrap.min.css">
      <script src="https://ajax.googleapis.com/ajax/libs/jquery/3.3.1/jquery.min.js"></script>
      <script src="https://maxcdn.bootstrapcdn.com/bootstrap/3.4.0/js/bootstrap.min.js"></script>
      <style type="text/css">
          .bg-primary {
            background-color: #1a52c6;
        }
        .lab {
            color: red;
        }   
      </style>
</head>
<body class="bg-primary">

    <h2 style="margin-left: 420px;margin-top: 100px;">Registration From in PHP with Validation</h2>
    <div class="row" style="margin-top: 60px;margin-left: 100px;">
        <div class="col-md-2"></div>
        <div class="col-md-6">
            <div class = "well">
            <form class="form-horizontal" method="post" action="insert.php">

              <div class="form-group">
                <label class="control-label lab col-sm-3" for="fullname">Full Name:</label>
                <div class="col-sm-6">
                  <input type="text" class="form-control" id="fullname" name="fullname" placeholder="Enter Full Name"
                  oninvalid="this.setCustomValidity('Please Enter Full Name')" oninput="setCustomValidity('')" required>
                </div>
              </div>

              <div class="form-group">
                <label class="control-label lab col-sm-3" for="email">Email:</label>
                <div class="col-sm-6">
                  <input type="email" class="form-control" id="email" name="email" placeholder="Enter Email" oninvalid="this.setCustomValidity('Please Enter valid email')" oninput="setCustomValidity('')"required>
                </div>
              </div>

              <div class="form-group">
                <label class="control-label lab col-sm-3" for="phone">Phone Number:</label>
                <div class="col-sm-6">
                  <input type="text"  maxlength="10" class="form-control" id="phone" name="phone" placeholder="Enter Phone Number" oninvalid="this.setCustomValidity('Please Enter Phone Number')" oninput="setCustomValidity('')" required>
                </div>
              </div>

              <div class="form-group">
                <label class="control-label lab col-sm-3" for="dob">Date Of Birth:</label>
                <div class="col-sm-3">
                  <input type="date" name="dob" style="color: black;">
                </div>
              </div>
           
              <div class="form-group">
                <label class="control-label lab col-sm-3" for="gender">Gender:</label>
                <div class="col-sm-3">
                    <select class="form-control" name="gender" required>
                        <option value="">select</option>
                        <option value="male">Male</option>
                        <option value="female">Female</option>   
                    </select>   
                </div>
              </div>
           
              <div class="form-group">
                <div class="col-sm-offset-3 col-sm-10">
                  <button type="submit" class="btn btn-default">Submit</button>
                </div>
              </div>
            </form>
            </div>
        </div>
        <div class="col-md-2"></div>
    </div>

</body>
</html>

After Run the Page You Can Get Design Like These.  


Output Screen:

registration-fom-php,registration-form-php-bootstrap
Registration Form


If you click on submit button you can see validation like these


registration-form-php, registration-form-php-bootstrap
Validation using Bootstrap


Step 2) Create Table

Now we Create table to store the registration information in database.

create table name as register or you want another name you can create table as you want.but table structure should be look like these


registration-form-php

 
 Step 3) Connection with Database

create a file name as db.php to make connection with database and table.

db.php

<?php 
$servername="localhost";
$username="root";
$password="";
$dbname="register";

$server_time=date("Y-m-d H:i:s);

$conn=new mysqli("$servername","$username","$password","$dbname");

if($conn){
    //echo "Connected Successfully";
}else{
    echo "Failed to Connect";
}


Step 4)  Insert Query 

Now Create one more page and save as a insert.php. In these page we write the insert query to insert our information to store in register table.

register.php

<?php
include"db.php";

$fullname=$_POST['fullname'];
$email=$_POST['email'];
$phone=$_POST['phone'];
$dob=$_POST['dob'];
$gender=$_POST['gender'];

$query=mysqli_query($conn,"insert into register(fullname,email,phone,dob,gender,date)values('$fullname','$email','$phone','$dob','$gender','$server_time')");

if($query){
  echo "<script>setTimeout(\"location.href = 'form.php';\",00);</script>";   
}
?>
 

Step 5) Now you can Fill all the information your registration page is ready to use.


registration-form-php-output


mysqli database connection using xampp

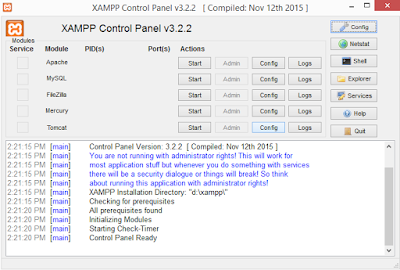
Step 1) Search  Xampp in Windows Search then Xampp Contol panel show like these. 


xampp-control-panel,mysqli-database-connection
Xampp Control Panel


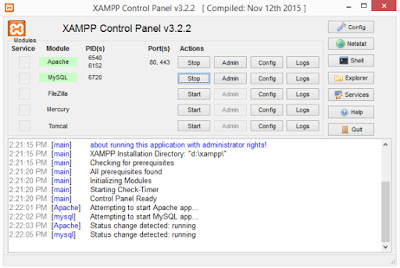
Step 2) Then Click  Start  Apache and MySQL button.

mysqli-start-xampp,mysqli-database-connection
Start MySQL & apache


Step 3) Open a Browser and type  https://localhost/phpmyadmin

Step 4) Click on New -> Database Name and click on create button.

In these example. new -> crud_ajax 


Step 5) Go in Computer Drive where you Install xampp 
Click  Xampp ->  htdocs ->  Create New Folder

In these example. Xampp -> htdocs -> crud_ajax


Step 6) Create new file in that folder and name as db.php

In these example. Xampp -> htdocs -> crud_ajax -> db.php


Step 7)  And write these code in  db.php file.

db.php

<?php

$servername="localhost";
$username="root";
$password="";
$dbname="crud_ajax";

$conn=new mysqli($servername,$username,$password,$dbname);

if($conn->connect_error)
{
    die("connection failed".$connect_error);

}else{

    echo "Connected Successfully";
}

?>


Step 8) Open a Browser and type https://localhost/crud_ajax/db.php


Output Screen:-

mysqli-connection,mysqli-database-connection-xampp
connection successfull